Friday, July 25, 2014

Pigeon Pea Gravy / Whole Toor Gravy


Pigeon Eye Pea Gravy (Whole Toor/Arhar Gravy)
We all have toor dal, some of us, almost daily, and Indian meals are incomplete without Daal. This gravy is a
healthy, tasty and an interesting twist to the humble Toor/Tuvar/Arhar Daal. A lot of health advocates mention that whole pulses are better than lentils. Since the lentils available in the market are all polished so fine, that most of the nutrition is lost.
SO this is a recipe to try, when you want to add taste to your meal, with totally Indian ingredients!
This gravy is very simple to make and no exotic ingredients have been used hre.

This dish is also staple in Gujarat, where it is paierd with wholesome Jowar Rotis or Rice Rotis that make up a complete meal. Depending on which part of India or the world you are located, you may have to check up with the local grocer for the pigeon eyed peas. In India alteast, any gujarati grocer would happily source it for you. This may not be available in any supermarket, though you may try. I believe this is because most of the
supermarkets stock the high selling items and Toor dal surely has higher demand as compared to its humble whole grain.

The whole grain is available in two variants - red and light coffee coloured.

In this particular preparation, I used the red variety. 


The whole Toor, when cooked, as an innate, unmissable flavour, hence does not need any spices.

Simple to cook, and finger-licking good!
Here's the recipe

What goes in: 

Whole Toor/Arhar/Pigeon Peas - 1 1/4 cup - soaked overnight and cooked until tender ( upto about 5-6 whistles) 
Onions - 3 Nos, thinly sliced vertically
Oil - 2 Tbsp
Cumin - 1 1/2 tsp 
Salt - to taste
Turmeric - 1/2 tsp 
Chilli Powder - 4 tsp - adjust to taste
Ginger - 1 tsp, grated
Asafoetida - a pinch
Curry leaves - 8-10
Corainder for the garnish 

How you make it: 


  1.  Pressure cook the Toor with some salt until tender. Do not drain the water used for cooking. this can be used. 
  2. Heat oil in a skillet, and add the cumin, asafoetida, ginger. Add the curry leaves.
  3. Add the onions, a bit of salt, and sauté well till onions are translucent.
  4. Add the turmeric and chilli powder, salt. 
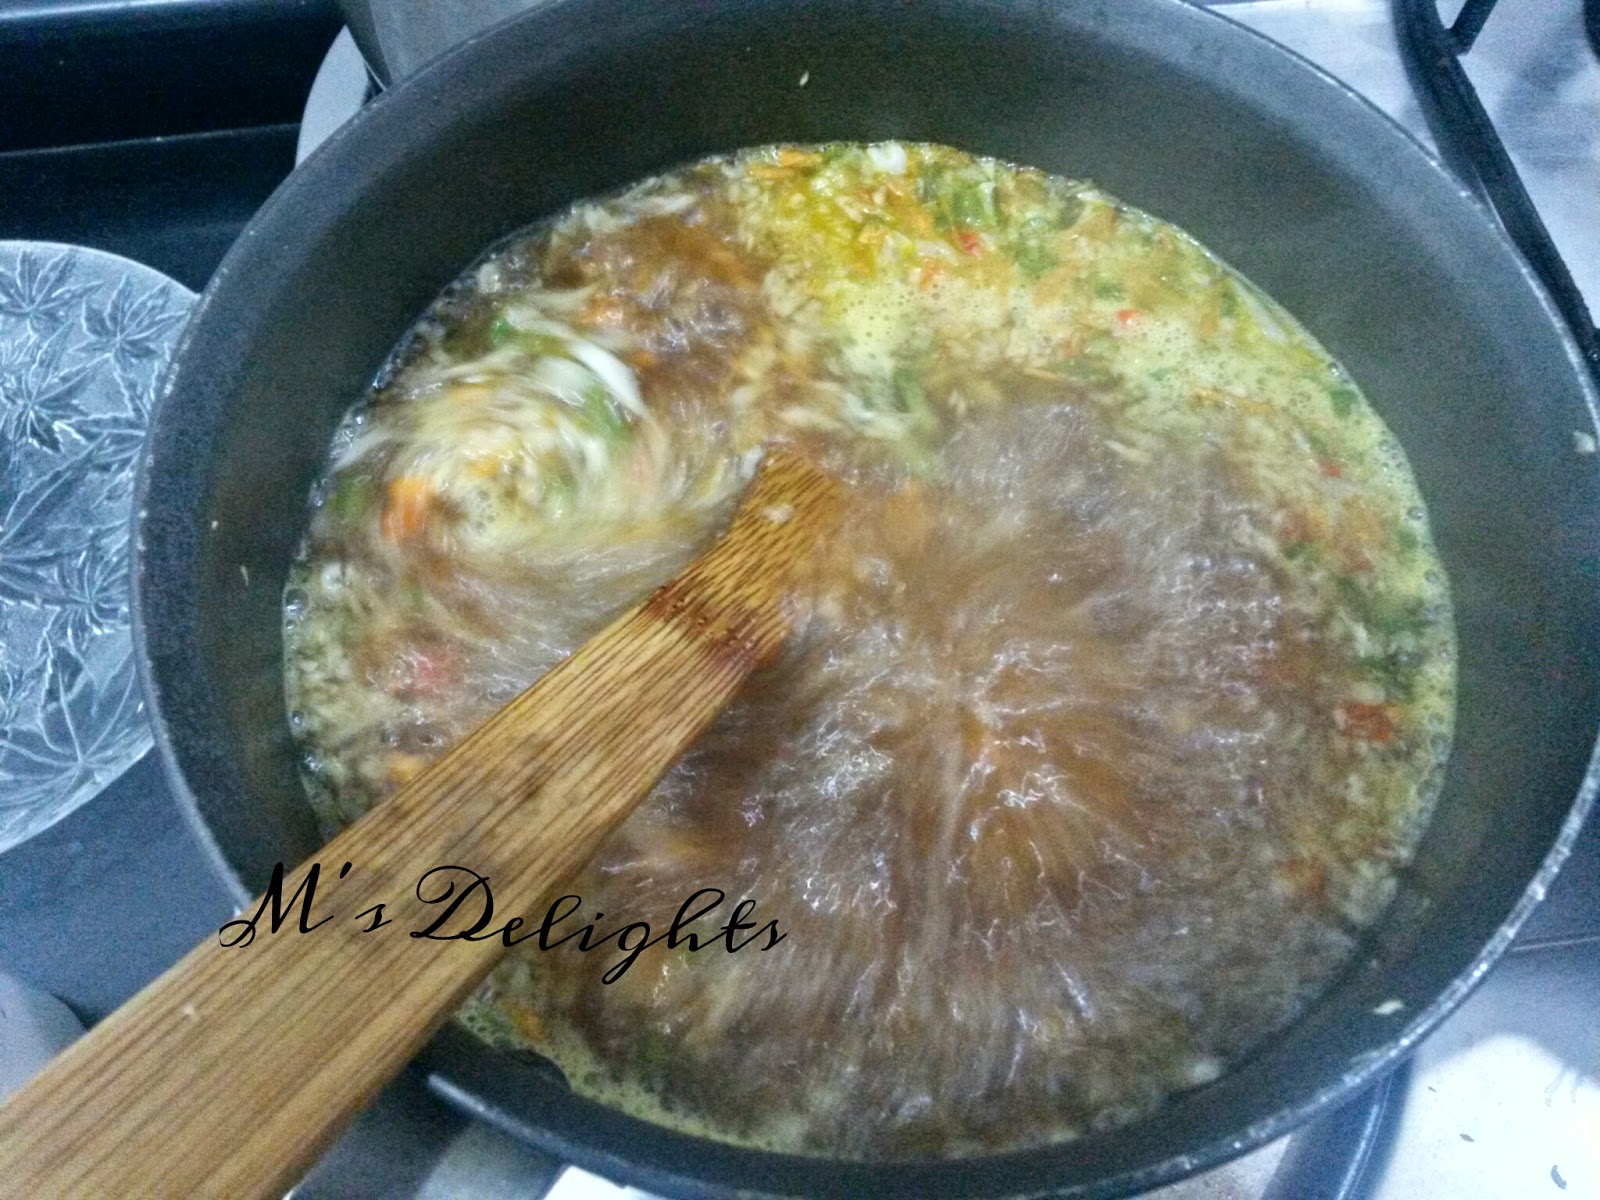
  5. Mix in the cooked toor along with the water and let this boil well for about 15 minutes. You may adjust the consistency of the gravy as you wish. 
  6. And the gravy is ready! Serve Hot with finely chopped corainder.
  7. This is best had with Jowar Rotis, and its the staple gujarati combination too. Chapathis/Rice also are a fine combination, if Jowar Rotis are not what you prefer. 


Enjoy! 


Note: 


  • Nothing can go wrong in this recipe. 
  • The Asafoetida and the Ginger help counter the bloating properties of Toor/Arhar. Make sure you add them. 
  • You may add 1 tsp of tamarind paste if you wish to have a more tangy flavour. 


Friday, July 18, 2014

Choco Surprise (No cook-no bake)

Need to prepare a quick sweet-dish, out of ingredients available at home, which is a no cook - no bake variety? 
The recipe that follows is just that! 
I vaguely remember having made a Biscuit chilled cake long ago,( really long ago, I must have been in school ) and I also remember it was decently good to taste. With the recent cake baking bug that's bitten me, and having engaged into a conversion of the same subject with friends, expert tips came up that the humble Marie biscuits can be beautifully transformed into a super surprise. So,  I thought why not attempt to try out these surprise truffles.

I had some chocolate ganache, and thought this was the best way to use it up.

This was a trial and I had no exact measurements of the ingredients to be used. I was extremely happy with the results. It is definitely a surprise package! 

The recipe makes about 30 choco-surprise truffles and it took me just about 30 mins to get them ready. 


What goes in : 

Marie Buscuits - 25 nos,  powdered (it can be a coarse powder, but ensure that there are no big bits) 
Condensed Milk - 1/2 tin, approx 200g 
Cocoa powder - 3 tbsp - you can add more for a chocolatey flavour ( I used Chocolate Ganache)
Milk powder - 2 tbsp (optional) 
Milk - 3-4 tbsp (optional)
Dessicated Coconut - 5 tbsp - for the garnish 


How you make it : 

  1. Take the powdered biscuits in a big mixing bowl. 
  2. Add the Condensed Milk, Cocoa powder ( or Ganache ) 
  3. Mix well till all the ingredients are incorporated well. 
  4. If you fond the mixture dry, you may add some milk. Milk powder can be used to make the mixture stiff if you find it loose, and the milk powder also imparts a rich flavour. 
  5. Since I had used Ganache made of semi-sweet chocolate, I did not add sugar at all. But if you use cocoa powder, you might want to add some powdered sugar. 
  6. Nothing can go wrong in this recipe, you can add the cocoa and sugar to suit your taste. 
  7. Once all ingredients are mixed well to a consistency where you can roll it into a small ball, and it retains its shape, its ready to be rolled. 
  8. Roll away into lime sized balls or truffles. 
  9. You might see a buttery sheen on the truffles and your palms. But don't worry, it will be absorbed by the biscuit mix. 
  10. Once truffles are ready, roll them in dessicated coconut. That tastes great! 

Enjoy 


Additional Gyan: 

  • Any biscuits that are less sweet and less buttery can be used. 
  • You might want to skip the cocoa powder and rather add 4-5 tbsp dessicated coconut. Adjust the milk to moisten the mixture. 
  • You can add chopped nuts like Cashewnuts and Almonds if you wish
  • Condensed milk can be made at home in less than 15 minutes. Will be posting the recipe soon. Stay tuned. 

Tuesday, July 15, 2014

Eggless Healthy Cake

What do you do when one side of the brain tells you Flour( and processed food of any type)  is not good for health and, the other side pinching the hunger zone, telling you to somehow have the healthy cake, linking it to the picture you saw on social media a couple of days ago? 
Well to cut the long sentence short, what I did was I baked that cake! 


I am an aware and healthy eater. And, no, I am not choosy or picky to the bone, but I know I will be what I eat. So I choose to eat healthy. Simple. 

This wheat flour cake was inspired by a social networking picture bosted by a member on a group. And it was enough to let my imagination take over. Offcourse, this friend was kind to share what she had used. And once you enjoy cooking/baking, you are sure to try out different combinations all by yourself. And sometimes, kitchen experiments do give out reasonably good results! Definitely satisfying ones :-) This cake was one of them :-) 

Let me share how I made this healthy cake. I was trying out with a small quantity. I would recommend you too first try out a small quantity. This recipe is for a small 6" baking pan. 


What went in:

Over ripe Bananas - 3 ( I used the small elaichi variety) 
Whole wheat flour - 3/4 cup
Thick curd - 1/4 cup ( a little sour is better) 
1/4 - 1/2 cup powdered jaggery ( you may want to add a little more)
flax meal - 1 tbsp ( mixed with 3 tbsp water and kept aside) 
Vegetable oil - 3 tbsp 
Oats - 2 tbsp 
Baking Soda - 3/4 tsp 
Cinnammon powder - 1 tsp
Salt - a pinch 
Chopped dry fruits - 3/4 cup ( Figs, dates, raisins) 
Water - 4-5 tbsp 

(For a vegan option, add 3 tbsp oil and 3 tbsp water) 


How I made it: 


  1. Preheat the oven at 180 degrees, grease and dust the pan.  
  2. Take some warm water in a bowl and soak the chopped dry fruits for some time.
  3. In a bowl take the wheat flour, baking soda, cinnammon powder and sift once. Then mix the oats and salt. Mix thoroughly Keep aside.
  4. In a big mixing bowl, mash the bananas. Add the curd, jaggery, the flaxmeal- water mix, oil and mix all this well till it is smooth and even. You might want to add more jaggery if you prefer this sweet. If you are fine with using white sugar in this recipe, you may use it. 
  5. Slowly add the dry ingredients to the wet mixture in batches of 3 tbsp each, at a time. Mix the contents well wit a gentle folding motion till you do not see any traces of dry ingredients. Repeat till all the contents are mixed well. Do not overmix. 
  6.  Strain the soaked contents and keep the water aside. Add the soaked raisins to the cake batter. If you find the batter too thick, add some water. 
  7. Pour this in the greased pan, tap the pan, and bake for 40 minutes. 
  8. You might want to cover the top with an aluminium foil with slits on the top to prevent the top from burning. 
  9. Bake till the cake passes the skewer/tootpick test. Once its done, turn off the oven and let it be in the oven for 10 mins. 
  10. Let it cool for another 5 minutes after you take it out. Invert and let it cool on a wire rack. Enjoy.

Additional Gyaan: 

  • Curd + Baking Soda is an egg replacer, 1 tbsp flaxmeal in 3 tbsp of water is an egg replacer for one egg, 1 cup milk + 1 tbsp vinegar is an egg substitute. 
  • I have also read that mashed ripe bananas work great as egg substitutes. 
  • I used three of the known egg substitutes. This made the cake too crumbly, nevertheless the taste was great. You might try with any one only. In other substitute, make sure you add 1/2 tsp baking powder. 
  • You might add walnuts in the batter for a nutty flavour. ( will be trying this one soon ) 
  • Cutting out curd makes this a vegan recipe. 

Sunday, July 6, 2014

Eggless Banana Cinammon Muffins

Muffins - Who doesn't love them?


I tried muffins for the first time today, and was pleasantly surprised with the results!

Easy to make and yum looking super delicious muffins in just about 20 mins baking time! Wonderful, isnt it?

These can be prepared even with the least of preparation or planning, I realised. Easy to make, yum to have.


What goes in:

All purpose flour ( Maida) - 1 cup
Over ripe bananas - 3 ( I used the small Elaichi variety) ( If you are using the normal ones, I'd recommend use one)
Granulated Sugar - 1/4 cup
Curd - 1/4 -1/2 cup
Vegetable oil - 1/4 cup
Baking powder - 1/2 tsp
Baking soda - 1/2 tsp
Cinammon powder - 1/2 tsp
Vanilla essence - 3/4 tsp
Salt - just a pinch


How you make it: 
  1. Preheat the oven at 170 degrees, and keep your tray lined with the cupcake liners. 
  2. In a bowl, mix together the flour, baking powder, baking soda, cinnamon powder and sift twice.
  3. In another big bowl, mash the bananas. To this, add the sugar, curd, oil, vanilla essence and the salt. ( I forgot the essence when I made these muffins today, and realised only when the muffins were in the oven ;) )  
  4. Mix all the wet ingredients really well for about 5 minutes. You may want to use your hand blender to beat it smooth, I did not use it. Bananas are soft, and the overripe ones get mashed quickly. If you feel the mixture needs water, add a bit of it.( I added about 2 tbsp of water) 
  5. One these are well mixed, add the dry ingredients mix, bit by bit. Use a spatula and a folding motion to mix, ensuring no dry flour is seen. I mixed this quantity in four batches till all the flour was mixed well. Do not overmix. 
  6. The baking soda starts working and you will feel the batter becoming light. 
  7. The batter would be thick, that is okay. 
  8. Use a spoon to fill the cupcake liners to about three fourths of the liner. 
  9. Bake for about 15-20 mins, or until a toothpick inserted comes out clean. 
Enjoy! 

I was focussed more on following the recipe right, hence missd taking pics of the exact procedure I followed...;-) A Sunday Sinner, eh ??;-) 

Recipe source: www.ticklingpalates.com


Some Gyan: 
  • Batter should be thick, that would give the muffin a slightly denser texture than cupcakes. 
  • Since there was Banana in the recipe, I refrained from adding milk. In my opinion, fruit and milk are not a very good combination. 
  • Watch the sugar. Bananas are sweet. You wouldn't want the muffins to be too sweeeet...
  • Muffins/Cupcakes take lesser time to bake. Keep looking for the top crust to change colour. Depending on your oven, you may have to change the plate orientation. I had to take out the tray, turn it and place it again, so that the ones on the inner side are on the outer side (when the oven door is opened). 
  • I try almost every cake recipe(baking) in fine wheat flour ( for all the obvious health reasons). Sall be trying this one too and will keep you updated. 
  • The original recipe was for double the quantity I baked. 
  • The original recipe called for apple pieces too, I skipped it. The sole goal this time was to use up the over ripe bananas and to soothe the sweet tooth's at home ;-)


Hot and Sour Soup

Who doesn't like the tangy Indianised Chinese hot and Sour Soup that is so popular? 

I still doubt if the Chinese ever prepare that variation, but I am sure every Indo-chinese food loving loves this spicy sour soup! 
I prepare it with a mix of veggies (popular in the indo-chinese food), and in goes a good quantity of the spice lending humble garlic, ginger and chilli.
It is simple to make, and filling in itself. It can make up for a meal ( for the weight-watchers) or can be followed by sumptuous Chinese Fried Rice. (The recipe shall follow) 

What goes in: 

Finely Shredded cabbage 1/4 cup
Finely shredded cabbage 1/4 cup
Shredded capsicum - half of the capsicum
finely chopped garlic - 1 tsp 
Finely chopped green chilli - 1 tsp 
Finely chopped / grated garlic - 1 tsp 
Salt to taste
Oil/Butter - 1 tsp 
Corn flour - 2-3 tbsp 
Soya Sauce - 2 tbsp
Water or vegetable stock - 4 cups
Vinegar - 1 tsp 


How you make it: 


  1. Take a big pan and heat the oil/butter.
  2. Add the Chilles, garlic and ginger. Saute it for a bit, watch that the garlic doesn't brown. (Browned garlic lends a different flavour, which is quite indian) 
  3. Put in the shredded vegetables and add some salt. This will moisten the veggies and they'll start to cook. You do not want to overcook them, soup is always better wit crunchy veggies. 
  4. After about 5 minutes of sauteeing, add water and bring to a boil. You can add as much water, as the number of soup takers. this means you will have to adjust the veggies. 
  5. Add the soya sauce, and then add salt. Soya sauce contains some salt, so you would want to taste first and then add the salt. 
  6. Bring to a good boil. 
  7. Take a small bowl and mix cornflour with 3-4 tbsp cold water. Put this mix into the boiling soup. in about a minute, you will see that the soup has thickened. Check the thickness. You may want to add more of the cornstarch to have a thicker soup. 
  8. Mix in the vinegar and turn off the stove.
  9. And the hot and sour is ready. Enjoy!!!


Some gyan: 

  •  If you would like Clear veg soup, leave out the soya sauce and vinegar. Moderate the chilli, cut out the garlic and ginger. Add a handful of green peas, and serve with a dash of lemon and coriander. Clear Veg soup is not very spicy. 
  • Vinegar/lime juice should be mixed after the soup boils and after you turn off the flame. 


Muthiya

Muthiya is a traditional gujarati snack dish which is nothing but spicy steamed rice flour dumplings. The very fact that the main cooking procedure is steaming makes it a healthy alternative.
This contains rice flour, so actually its a meal in itself.


Try this with different vegetables every-time, and you will have more variety.
The next time you are bored of the regular Roti, Sabzi, Dal-Chawal routine, try this. Best ejoyed for dinners. Makes the dinner light for the tummy and healthy for the body.

Muthiyas in Gujarat are especially enjoyed in the June-July months, at the onset of monsoon. This is because the greens are available only for about a 15 day period. You may not find this in the markets, these are available usually with ladies who bring veggies in baskets which they carry on their head. They get the greens from villages, or probably even grow them in their small patches of land. ( I know this as we buy our veggies from these ladies :-) They get us fresh veggies, which has not undergone a long journey to reach my kitchen, like the veggies purchased from malls. If you live anywhere in Gujarat, you may get this. If you are not in Gujarat, you can still enjoy muthiyas made of Fenugreek leaves(Methi) or Bottlegourd (Doodhi)


What goes in:

Muthiya greens - two bunches, finely chopped.
Options other than muthiya greens are Methi (Fenugreek), Bottlegourd, Onion etc - Bottle gourd should be grated.
Chilli - garlic- ginger paste - 2 tbsp
Rice flour - 1 cup
Bengal gram flour ( Besan) - 2 tbsp
Jowar flour (sorghum) - 2 tbsp (optional)
Salt - to taste
Oil for kneading - 3 tbsp
Water for kneading
Asafoetida - 1/2 tsp
Red chilli powder - If you prefer a red colour and more spice
Turmeric powder - 1 tsp

For the tempering -
Mustard seeds - 1 tsp
Sesame seeds - 1 tsp
Curry leaves - 10-12


How you make it.


  1. Take a bog bowl and toss in the chopped greens. Add one tsp of salt to it and mix well. Let it rest for some time. This will release some water from the chopped greens. 
  2. To this, add the chilli-garlic-ginger paste, salt, chilli powder, turmeric powder and Asafoetida. Mix well. 
  3. Add the flours and first, dry mix all of this. 
  4. Add oil, and little water, slowly kneading into a a consistency where you can roll the dough into a log shape and it remains firm, yet soft. To get the consistency right, try taking a fistful of the dough and press firmly. It should get shaped well. 
  5. make cylinders 3 inches long and about 1.5 inches thick. 
  6. Steam this for about 15 minutes. 
  7. Once steamed, let these cool. 
  8. Cut them into half inch pieces. 
  9. For the tempering, heat the oil, add mustard seeds. As the mustard seeds start sputtering, add the sesame seeds and the curry leaves. Add the muthiya pieces. 
  10. Muthiya
    Muthiya preparation
  11. Toss well and serve hot! 
Enjoy 

Variations: 

  • For the not-so-health-conscious people, if you enjoy fried food, the good news is Muthiya can be fried ! ( At home, we are two groups, one likes the steamed one and the other likes the fried ones ;-) ) 
  • For the fried version, use only gram flour. you can add some sorghum flour. But like any other indian fritters, gram flour works best here. 
  • Incase the steamed version is leftover, and you are wondering what to do with it, just crush it with your fingers. And toss into a wok with some heated oil. Makes for a nice rice upma! 
Enjoy! 
]


Wednesday, July 2, 2014

Spouts Salad

Sprouts Salad

Who is not health conscious these days?

And, who said eating healthy means eating boring?

Here is an interesting, quick Salad, that's easy on the tummy, and you can gorge on it without any guilt!
Winters would make this salad more interesting with better choice of vegetables.

What you will need:

Green mung bean sprouts - 3/4 cup
Cucumbers - 2, finely chopped
Carrot - 1, finely chopped
Onion - 1 medium sized, finely chopped
Green Chilli - 1, finely chopped
Walnuts - 1 tbsp , chopped or coarsely pounded
Cashewnuts - 1 tbsp , chopped or coarsely pounded
Salt - to taste
Honey - 2 tsp, to drizzle
Flaxseeds - 1 tsp
Lime juice - 1 tsp (optional)


Method:

1. Green Mung Sprouts need to be partially cooked in a covered vessel with very little water. Do not overcook. 5- 7 minutes is just fine. Keep the vessel covered, the mung beans will further get cooked in the steam. Optionally, you may use raw sprouts.
2. Take a large mixing bowl, and mix all the ingredients very well.
3. That's it! The Salad is ready! Complete guilt free bingeing!


Additional Gyan:
- To make this a Satvik recipe, skip the onion
- Once you mix everything well, the salt causes the cucumber to lose a lot of water. The best time to have it is right after its mixed.
- Honey, walnuts, cashwenuts, flaxseeds are the health boosters in this salad. Make sure the nuts are in moderation. :-)
- Optional veggies can include red/yellow/green bell peppers, tomatoes, boiled corn.


Spinach and Corn Veg Gravy

Its that time of the year when corn is seen everywhere in markets. A roasted corn-n-the-cob is an all time favourite, agree, but corn tastes great when teamed up with the right veggies too. Here is my version of the popular Spinach-Corn Veg gravy. I am a total fan of Spinach, (A Popeye fan too ;-)), and I can't thank God enough for this lovely green Vegetable! :-) 

Here's my recipe which generously serves 4

Ingredients: 

Spinach - atleast 2 bundles 
Corn - 3/4 - 1 cup, boiled (The indianised-american, yellow variety) 
Onions - 2 finely chopped
Garlic - 4 cloves, finely chopped
Kasuri methi - 2 tsp
Green Chillies - 3 nos
While Garam Masala - 
Cinammon - 2" sticks - 2 Nos
Cloves - 4 
Bay leaf - 1 
Powdered Garam Masala - 1 tsp 
Turmeric - 1 tsp
Chilli powder - 2 tsp ( as per taste) 
Salt - As per taste
Milk - 3tbsp 
Ghee - 2 tsp (Clarified Butter)
Cumin - 1 tsp 

Method: 

1. Clean and wash the spinach well. Steam it in a colander. This process should be timed well. Steam the spinach only for about 5 mins. Turn off the heat. 
2. Pressure cook the corn till tender. 
3. Let the spinach cool. A way of cooling it is to hold it under running water, or immerse in vessel full of cold water. In my opinion, this will sap the spinach of its nutrients, so Avoid this. Once spinach cools a bit, puree the spinach along with a handful of the boiled corn, kasuri methi and green chillies. The pureed corn will impart thickness to the gravy. Puree the corn first, adding the spincah later. Keep the spinach coarse. 
4. Take a skillet, and heat the ghee. Once hot, add the cumin. Add the whole garam masala and fry well. 
5. Add the garlic, saute for about a minute on low flame before it browns. Add chopped onions and saute till they are translucent. 
6. At this stage, add the turmeric, chilli powder and the garam masala. Ensure it mixes well. Add the boiled corn. Saute well ensuring it doesn't stick to the skillet. 
7. Finally add the pureed spinach-corn mixture. Add salt as per taste. Add some water to loosen the gravy. 
Let this simmer for a while. Add the milk. Let this cook for 7-8 mins. 

Spincah-corn veg gravy is ready. 
Goes well with hot Paratha/Chapathi. 
 (Recipe adapted from Tarla Dalal's collection) 


Some Notes: 

- I personally do not favour mixing Tomatoes and Spinach as it changes the colour and texture, and alters the rich spinach taste. Iron sources like spincah must be combined with Vit C sources, and a dash of lime can add that nice tangy flavour to this rich dish. ( Either avoid the milk or the lemon juice, we all know why... ;-) ) 
- If Spinach is coarsely pureed, it adds a nice texture.
- Kasuri Methi is dried Fenugreek leaves - adds a whole new flavour to spinach. 
- Milk is completely optional. 
- Add salt with caution, spinach contains sodium, so it will have some traces of salt.